Synopsis
A quick history lesson…
Before CSF offered its current version V3 Ultimate K-swap Radiator, there was a V1. CSF introduced a high quality K-swap V1 radiator to the market sometime back in 2011-2012, that was marketed with Hasport on their K-swapped Prelude at the time. The V1 design was a mix of the DC2 Integra X DC5 RSX radiator’s in mind with an eye popping mirror finish, a thick AF core, and overall amazing craftsmanship. But the V1 didn’t bring its ultimate game until later.

Easy fitment design wasn’t realized yet for the big 3 Golden Era chassis’s (EG/EK/DC) without some form of modification, namely to the EG/EK Civic’s. Around 2013-14, I linked up with CSF Ravi (via JHPUSA at the time) and offered some key design changes for a Version 2 release that would unlock ULTIMATE mode! Ravi thankfully applied those changes and released the V2, thus developing a single and cost effective Ultimate full size K-swap radiator to fit the big 3 G/E chassis’s. Come 2017, the V3 dropped offering some BIG updates over the V2 and virtually smoking any/all K-swap full size radiator competition on the market both cost and feature wise. This radiator is no bullshit. It’s made for K-swap enthusiast who WANT maximum cooling on the street, cuckin’ around a parking lot meet, or track beat all while being aesthetically appealing.
While the V3 offers a host of tasty features, there are some unmentioned caveats that need to be addressed that are covered in this article.
I recently came across several YouTubers who’ve offered video installation instructions for the V3, and interestingly enough all seem to share similar install issues:
- Oddly enough, CSF does not include any installation instructions (true)
- Some of these tubers couldn’t figure out the upper radiator stay mounting configuration (for EG/EK civics) nor how the lower mounting works.
- Some had difficulties figuring out what lower radiator hose to use because of the factory K-series thermostat hose fitting angle to the lower radiator outlet’s positioning – (this can be partially thanked to no instructions and not having a suggested hose to use — hint: an EP3 Civic or RSX lower rad hose will work with trimming!)
- For the ones who purchased a CSF fan shroud, they had issues bolting the fan to the shroud due to the included mounting bolts being a little on the short side. (hint: they just need some extra install force for the threads to catch)
Design Overview
Inlet & Outlets
The catalyst for this radiator’s original design were cues taken from the factory RSX radiator: both upper and lower inlet/outlet positioning, a threaded fan switch bung adjacent to the lower outlet, and upper + lower mounting stand-offs/pegs. The idea of mimicking the RSX lower outlet positioning was to keep hose angling and fitment inline with that of an RSX or EP3 Civic Si for a K-swapped vehicle. You would simply use an oem or aftermarket RSX or EP3 Civic Si lower rad hose and trim it down appropriately.


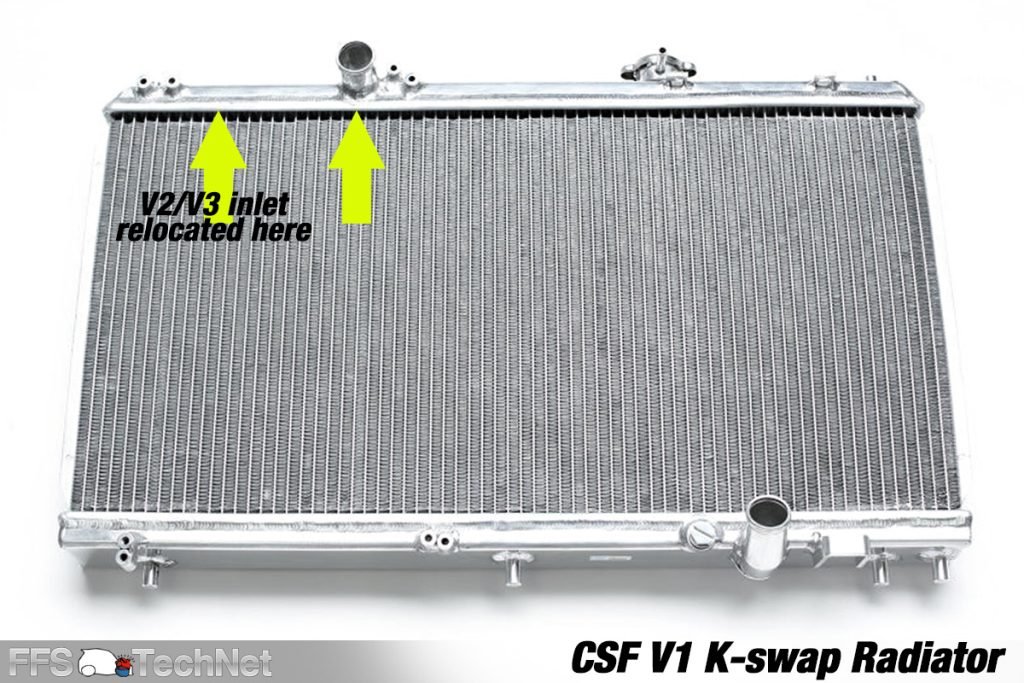
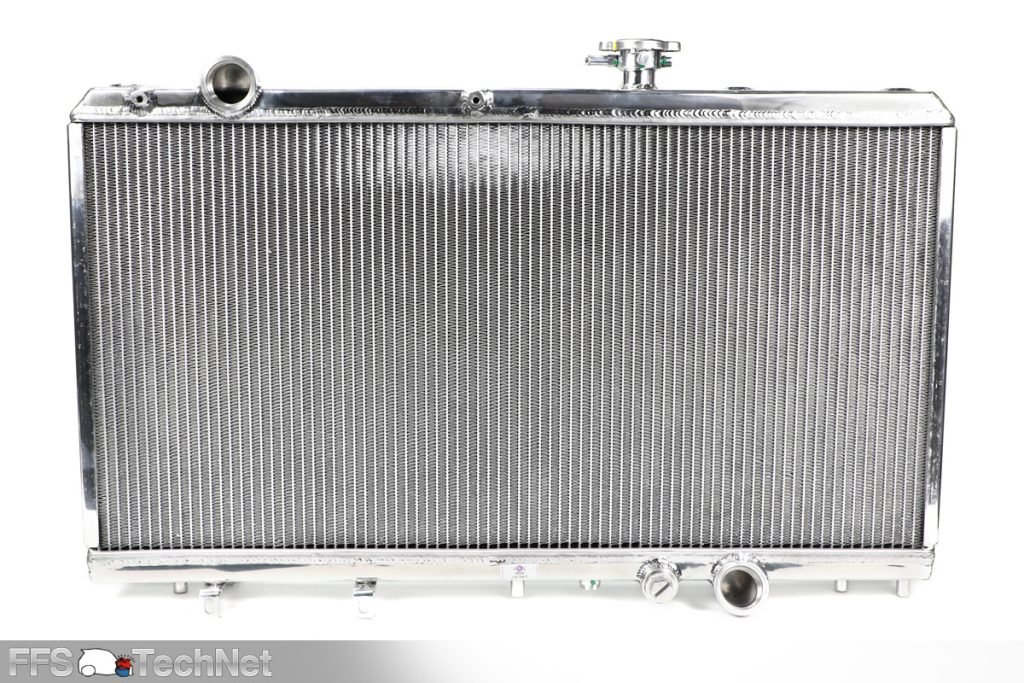
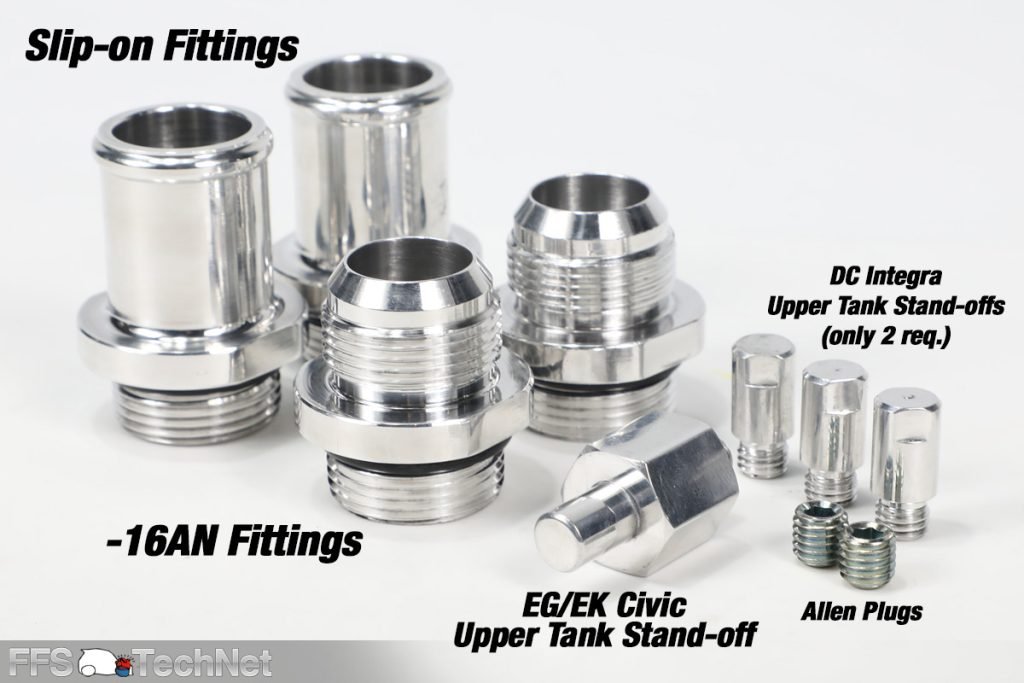
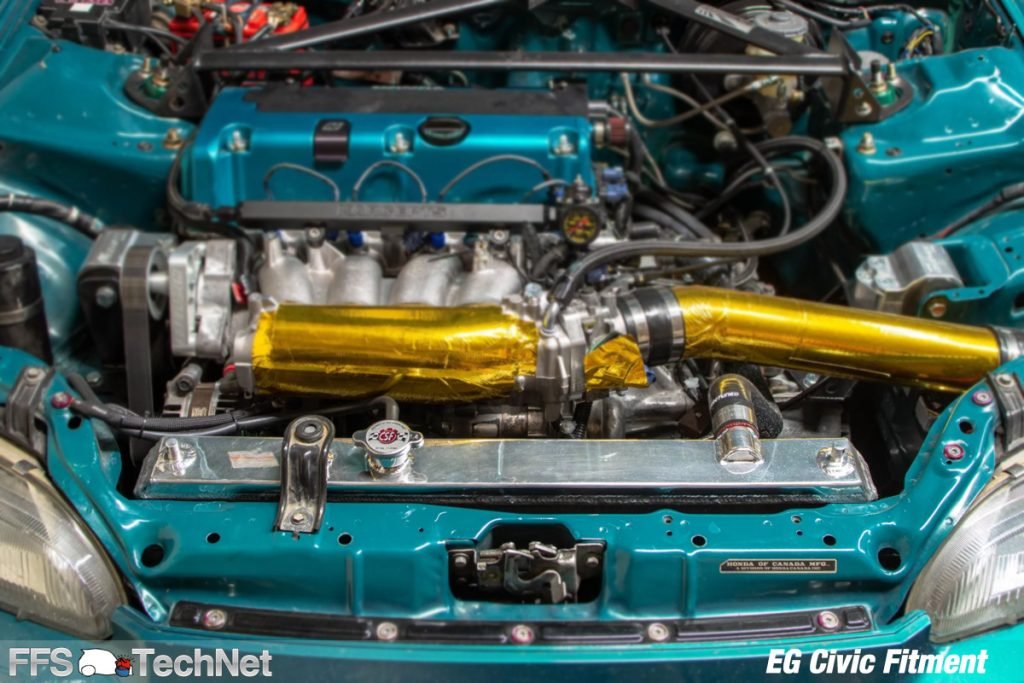
On the upper tank, a revision for the V2/V3 model was relocating the upper inlet over to the left several inches side. This offered ample clearancing away from the throttlebody when upgrading a K-series intake manifold to that of an RBC/RRC/RSP or aftermarket RBC style intake manifold. Said manifold style puts the throttlebody right in the path of the factory RSX inlet location which the V1 inlet position was based off of. For the V3, CSF came with the sickness and offered slick new threaded inlet & outlet bungs and included optional aluminum slip-on hose fittings and 16AN fittings – impressive!

Radiator hoses
Hoses are not included with this radiator, but there are aftermarket K-swap specific hoses offered by Hybrid Racing, K-Tuned and several other companies.
For the upper hose, the type of K-series cylinder head will dictate which specific K-swap hose you will need to use from one of those companies.
For the bottom hose (as previously mentioned) an RSX or an EP3 Civic Si lower radiator hose is highly suggested to use along with a downward facing factory K20A2/Z1/RDX thermostat or an aftermarket swivel style thermostat housing. As a heads up, the RSX/EP3 Civic lower hose will need to be trimmed down as it will be too long in its stock form for a K-swap EG/EK/DC2. It is highly advised to trim this hose down in small increments in order to work out the slight kink it will have, while test fitting each time it’s trimmed down. If you haven’t experienced silicone rad hoses, they’re finnicky, and can weep coolant almost no matter how tight the clamp is. It can be an annoyance for sure. I’d suggest going with a basic rubber lower hose if you don’t want to deal with coolant weeps. There’s a chance a future V4 rad will have a relocated lower outlet that will be more aftermarket lower hose friendly. There also might be a chance the V4 may include its own K-swap rad hoses too!


Filler neck
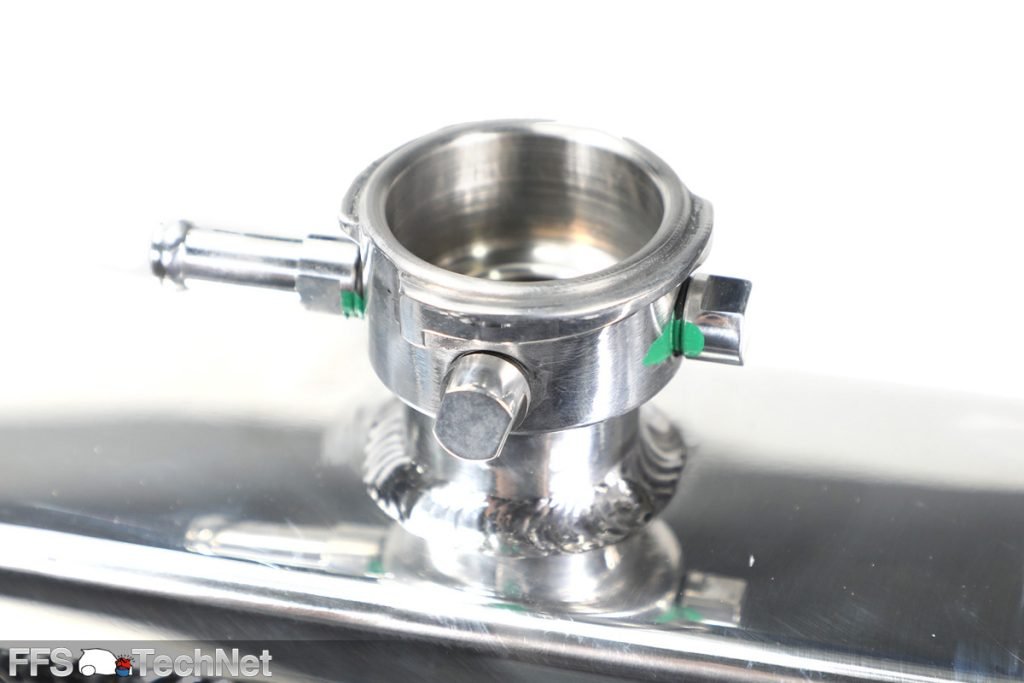
The V3’s filler neck location mimics the factory EG/EK/DC filler position respecting factory under hood clearances. The V3 filler neck also has 3 optional positions for mounting the coolant reservoir tank breather barb for whichever direction you’d like to route your reservoir tank and hose line. A CSF branded radiator cap is included too!



Upper & lower Mounting
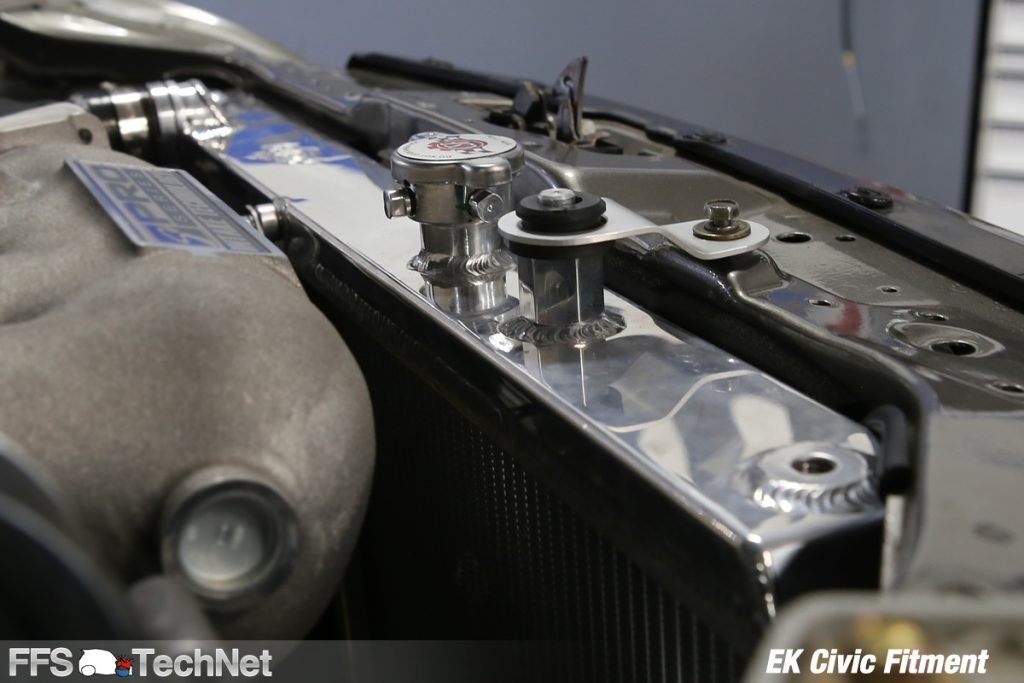
Being that CSF’s goal was a single radiator application for all three chassis’s, a compromise had to be made but mainly for EG/EK Civic fitment (read on).
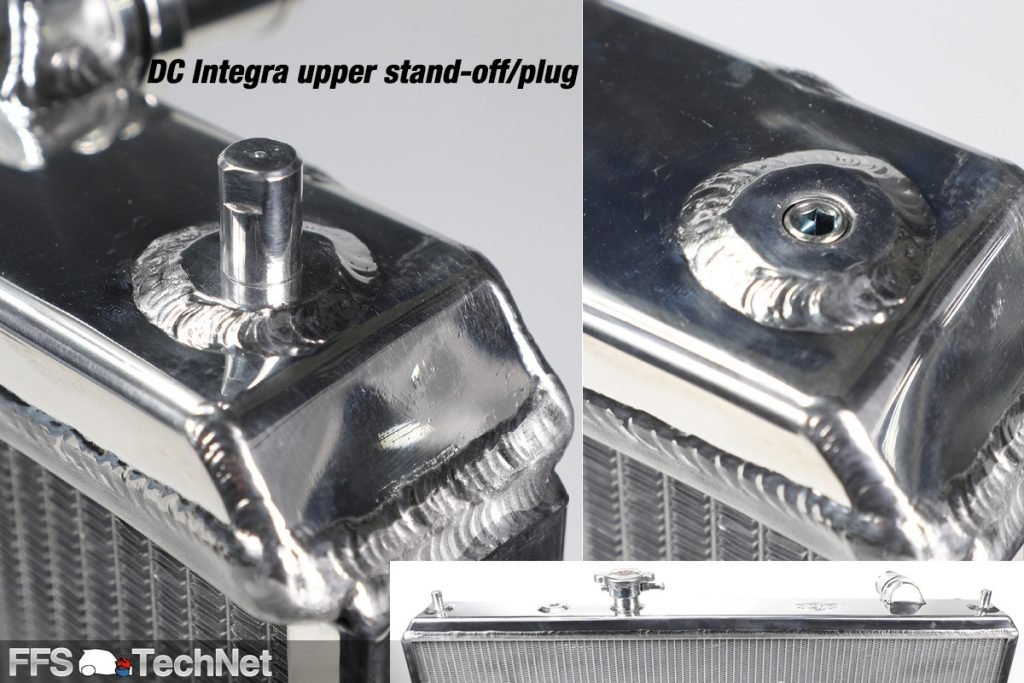
Observing the upper tank, you should see three distinct welded threaded bungs (or Areolas as I call them). CSF includes removeable vehicle application specific stand-offs and Allen plugs for any unused Areolas. Both Areolas on either ends of the tank are for DC Integra use. The Areola adjacent to the filler neck is for EG/EK Civic use. These provided stand-offs make it possible to retain factory (or aftermarket replacement) upper radiator stay use.
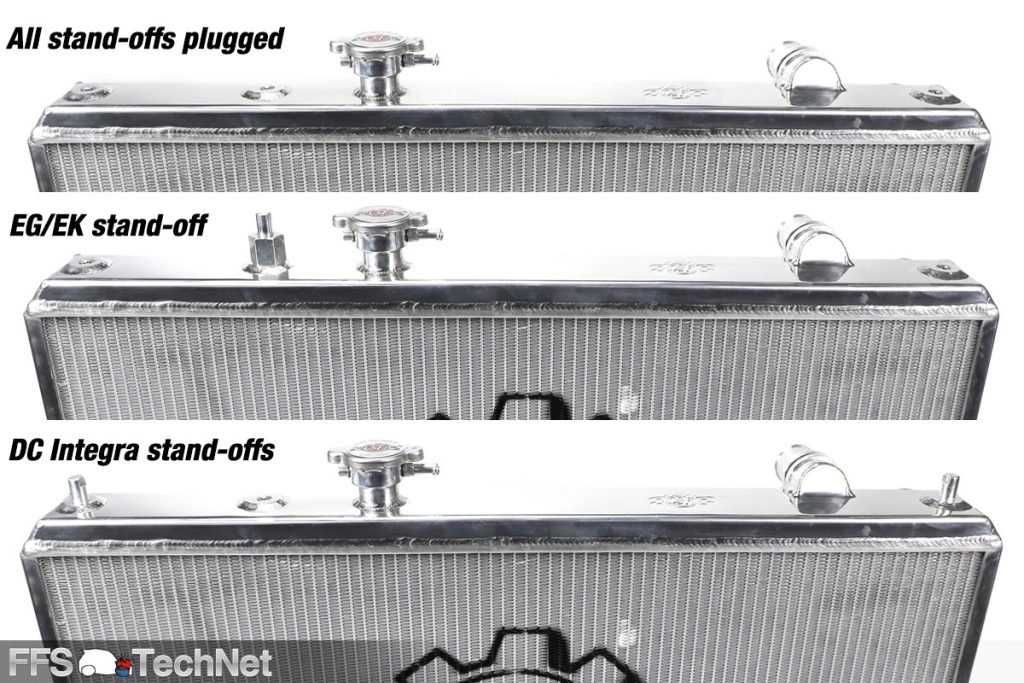

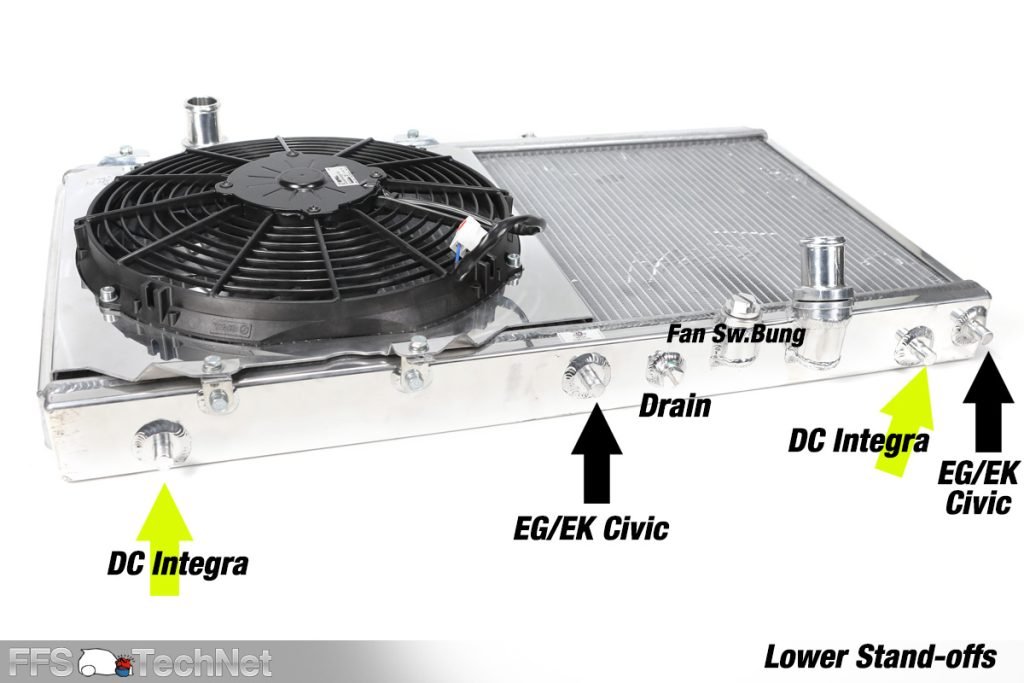
Observing the bottom tank, there are several permanent stand-offs welded in place. See image below – the stand-offs on the very far ends of the tank are for DC Integra use and should align directly to the factory Integra lower radiator mounts and bushings. Looking at the right side of the tank you should see stand offs that are paired closer to each other, these are designed to align directly to the factory EG/EK civic half-size radiator lower mounts and bushings. It is required to fully remove/drill out the EG/EK civic A/C condenser brackets as they’re a complete obstruction for proper CSF radiator installation.


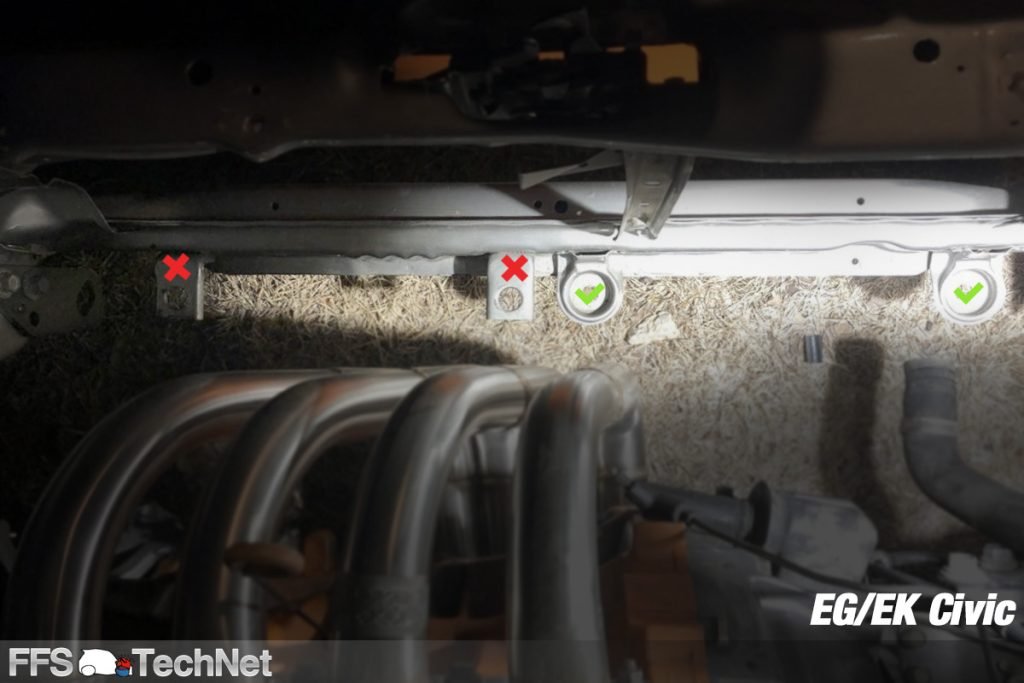

If you haven’t noticed, the EG/EK Civic application V3 rad support is all right side oriented. It’s basically replicating the stock EG/EK civic half-size radiator upper and lower support. Don’t trip too hard over this, its part of the design and has solid overall support and has been tested, I should know I’m a user lol.
If you’re still feeling uneasy about the lack of lower left hand tank support, you can buy an aftermarket DIY lower rad bracket kit as shown, and make use of the available lower left (Integra) stand-off/peg.
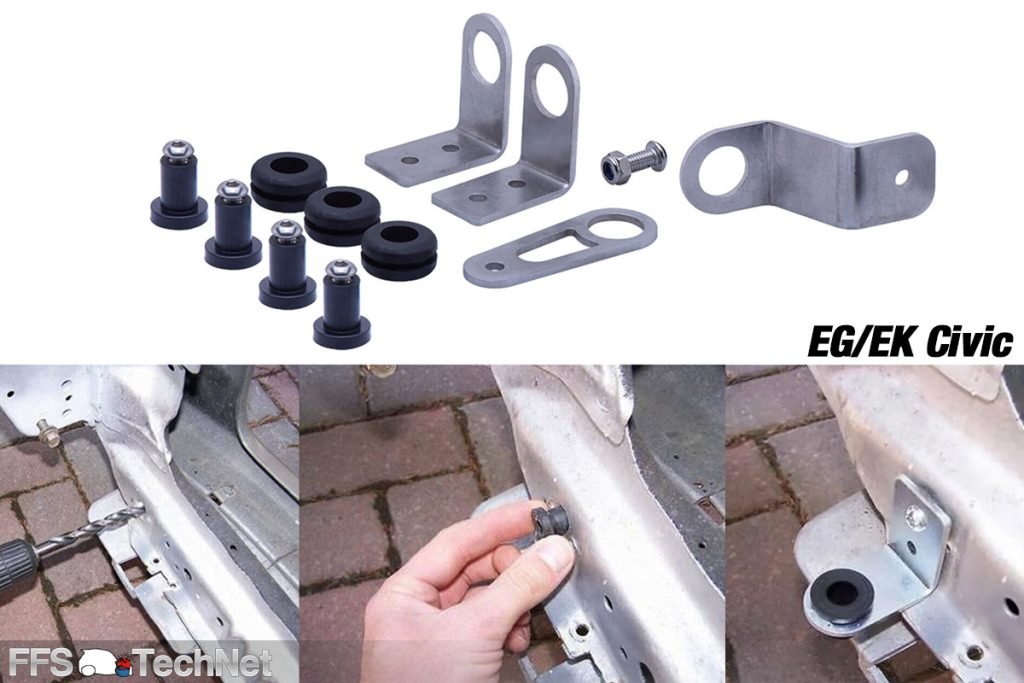
DC Integra installation is less work to install. No condenser brackets are in the way, it’s a straight up drop-in affair, reusing existing lower bracket rubber grommets and upper rad stay with the provided CSF upper stand-offs.
Fan Shroud w/Spal Fan
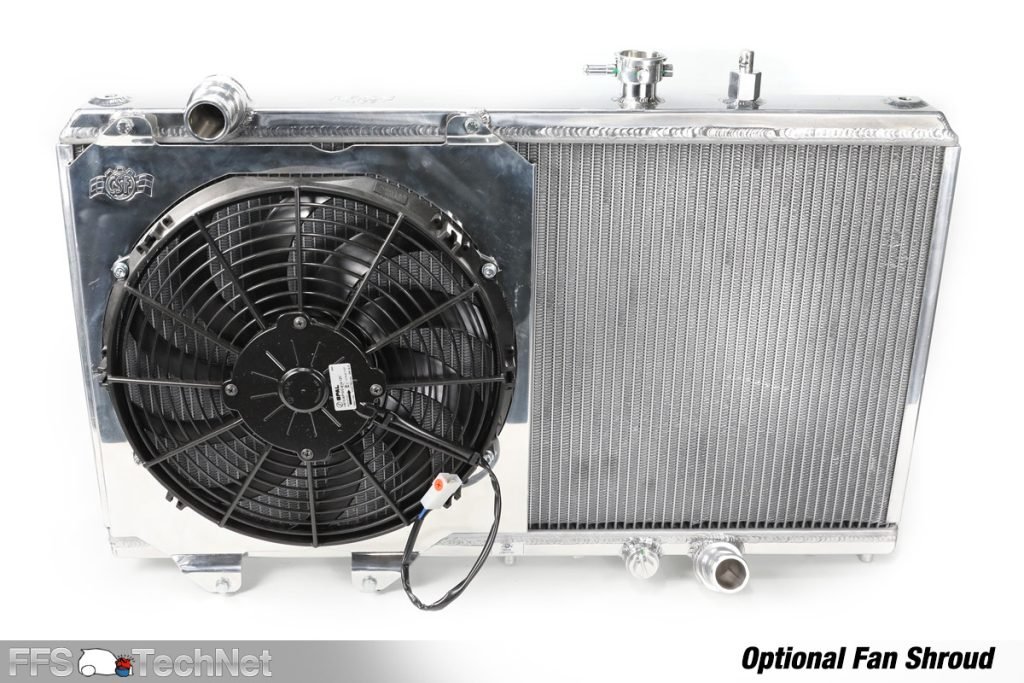
CSF separately offers a bolt-on aluminum fan shroud kit that includes a high quality high CFM SPAL fan. The V3 has pre-integrated fan shroud mounting provisions so its a simple bolt-on affair. One big tip as previously mentioned, you do have to apply some force when using the included fan mounting bolts as they’re a little on the short side due to their embedded washers. Force helps crush the washers down and will allow the bolt threading to catch. Hopefully CSF will address this in a future V4 update including some slightly longer fan mounting bolts.


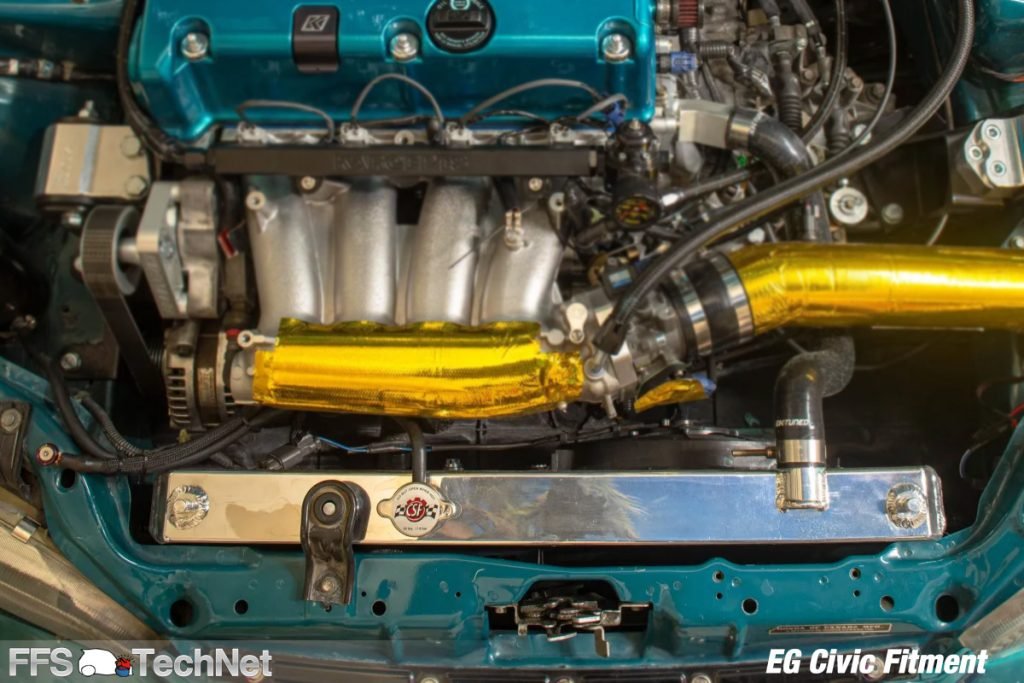
installation gallery
Here’s a gallery showing installations of all 3 Golden Era chassis’s…





final tech notes
- CSF V3 radiator is compatible with K20 and K24 K-swaps
- CSF mirror finish V3 rad part number: #2850K / fan shroud kit #2858F
- CSF black finish V3 rad part number: #2850KB / black fan shroud kit #2858FB
- A factory Acura RDX K23A thermostat has a downward angled hose fitting but is designed to bolt right up to a K20Z3 or K24A thermostat backside housing (so there’s no need to completely change over to a K20A2/Z1 rear housing!)
- EK civic and DC2 integra both share the same style of upper radiator stay. Integra uses two stays, EK civic uses one.
- Look on eBay for an a la carte silicone RSX/EP3 Civic Si lower radiator hose or your local parts store for a rubber hose version.
- Depending on your K-series cylinder head’s water neck angle (either 45 or 90 degree); Hybrid Racing, K-Tuned, PQY and other companies all sell properly angled -under air intake pipe- K-swap upper radiator hosing; research your head model number! Hybrid and K-Tuned seem to only sell their hoses in upper & lower pairs (not singles) where the lower hose is usually useless with the V3. PQY brand (eBay) offers hoses individually which can save some $$.
